Creating Tables on a Web Page


Creating tables on a web page can be exciting, meaningful, interesting and frustrating.

As you can see, it is difficult to read this as the words are running into the margin. We all know that you are not supposed to type in the margins. Remember.

Yet, if you look at the title, it is neatly centred and it does not run into the margin. How did I do this?

Let's look at the three ways you can make a table. There are three words that you will need to know. These words are automatic, percentage and pixels.

The following are some samples of how your table might look depending on which of the above, highlighted words you might have chosen using the Table Object Editor. Ah, yes, another word you will need to learn.

Once we look at the samples, you will then be given step by step instructions (with graphics) on how you can include any one of these table samples into your web page.

1. "AUTOMATIC" TABLES

Table One below was created by choosing Auto in the Table Object Editor. This means that when you leave the Width and Height boxes empty while working in the Table Object Editor, the browser you use to look at your table will decide your table's width and height. This means you have lost control or power. As you can see, it is not really appealing or acceptable as the words are running into the margin.

TABLE ONE

Author

Robert Munsch

Book Title

Mortimer

2. "PERCENTAGE" TABLES

Table Two below was created by choosing Percent in the Table Object Editor. If you go to the Table Object Editor and choose Percent next to the Width and Height, the computer automatically calculates the percent of the width and height of the table it has just generated.

In table two below, the percent for the width shows up as 100 percent and the height shows up as 12 percent. This means that the table width and/or height appears as a specified percentage of the browser window width and height. Now, you have some control. You can control how this table appears on the browser because you can change the percentages for the width and height.

TABLE TWO - This demonstrates a "percentage" table set at a width of 100 percent and a height of 12 percent. These settings were generated by the computer based on the graph it created.

Table A - This is a table that was generated by changing the percentages to 50 percent for width and 25 percent for height.

As you can see from Tables B and C below, you have greater flexibility in controlling the width and height of your table when you use the Percent choice in the Table Object Editor.

Table B - This is a table that was generated by changing the percentages to 75 percent for width and 50 percent for height.

Table C - This is a table that was generated by changing the percentages to 25 percent for width and 10 percent for height.

However, Automatic and Percent choices in the Table Object Editor are not perfect when you want a "fixed" table and greater control when formatting text based on graphic images. This leads us to our third choice of Pixels.

3. "PIXEL" TABLES

Table Three below was created by choosing Pixels in the Table Object Editor. If you go to the Table Object Editor and choose Pixels next to the Width and Height, the table width and height is always the specified size regardless of the browser's window size. (In this case 50 pixels were chosen for both the width and the height.)

As you can see from Tables D, E and F below, you have even greater flexibility in controlling the width and height of your table when you use the Pixel choice in the Table Object Editor.

TABLE THREE


Table D - This is a table that was generated by changing the pixel choice to 25 percent for width and 75 percent for height.

Table E - This is a table that was generated by changing the pixel choice to 75 percent for width and 225 percent for height.

Table F - This is a table that was generated by changing the pixel choice to 200 percent for width and 200 percent for height.

How can you make these tables?

Keep going and you will find out!

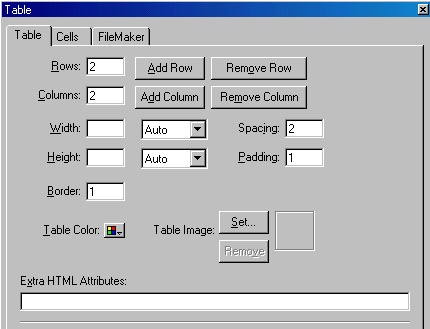
Making Tables Where the Width is Defined Automatically

  • Click on the Insert Table button
  • The Table Object Editor box will appear
  • Select the number of rows and columns you would like your table to have as the computer automatically creates 2 rows and 2 columns. This can be found under the Table tab at the top
  • Do not change anything else. The computer has already set the width and height to Auto

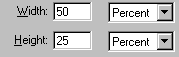
Making Tables Where the Width is Defined by Percent

  • Click on the Insert Table button
  • The Table Object Editor will appear
  • Select the number of rows and columns you would like your table to have as the computer automatically creates 2 rows and 2 columns. This can be found under the Table tab at the top
  • Next to the width and/or height heading there will be a box that shows Auto with an arrow.
  • Click on the arrow and select Percent
  • The computer will automatically generate the width and height percentages for the table you have just created. Go ahead and change the percentages shown to create a table that better suits your needs
  • Hit Enter to set your selections
  • To close the Table Object Editor box click on the in the top right hand corner of the box.

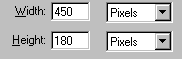
Making Tables Where the Width is Defined by Pixels

  • Click on the Insert Table button.
  • The Table Object Editor box will appear
  • Select the number of rows and columns you would like your table to have as the computer automatically creates 2 rows and 2 columns. This can be found under the Table tab at the top
  • Next to the width and/or height heading there will be a box that shows Auto with an arrow
  • Click on the arrow and select Pixels
  • The computer will automatically generate the width and height pixel settings for the table you have just created. Go ahead and change the pixel settings shown to create a table that better suits your needs
  • Hit Enter to set your selections
  • To close the Table Object Editor box click on the in the top right hand corner of the box.